
| |
|---|---|
Mission Type: |
Main Mission |
Section: |
Ubersreik Act 3 |
Chests: |
8 |
Tomes: |
3 |
Grimoires: |
2 |

| |
The Enemy Below is a mission in Vermintide.
Synopsis[ | ]
Franz Lohner is suspicious of a lull in Skaven activity and requests that the heroes investigate a new ratmen tunnel that has appeared in a nearby cellar. The mission progresses downwards through a stonework sewer area before breaking through into an underground Skaven complex where the heroes find something to blow up. Once the demolition has been accomplished, the heroes must escape back to the surface via a series of forked tunnels while the tunnels collapse around them.
Tomes and Grimoires[ | ]
Tomes[ | ]
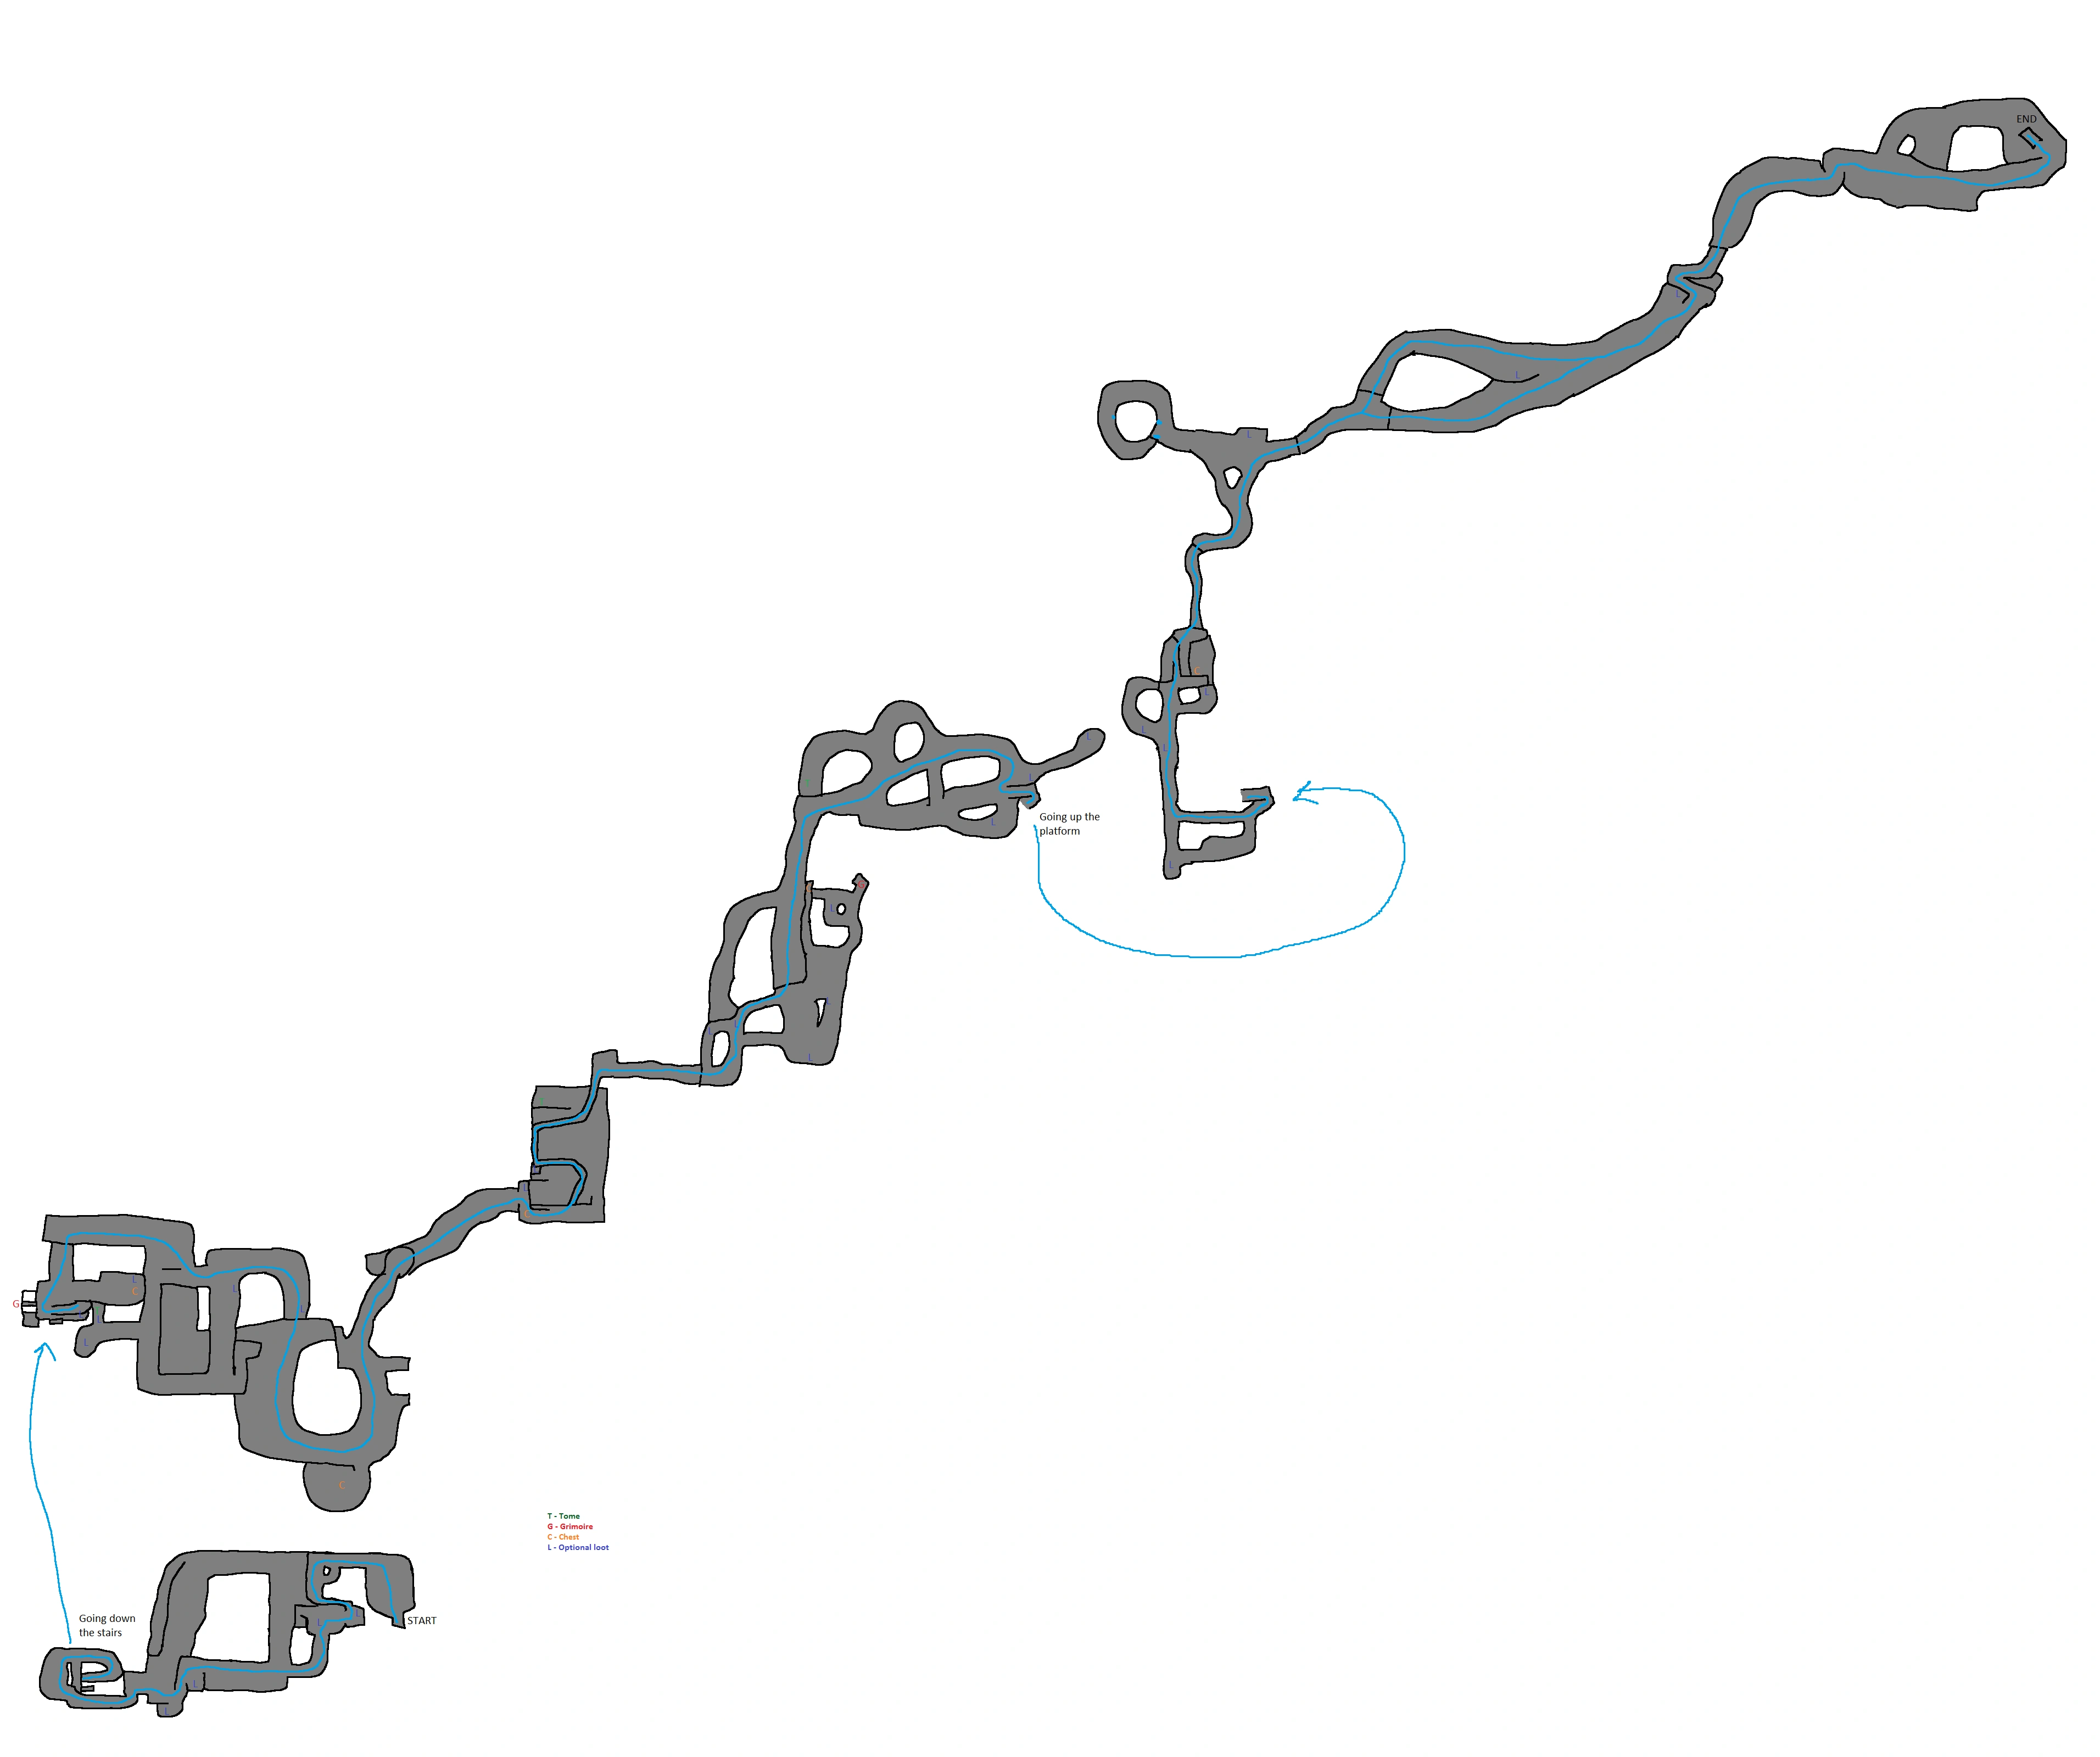
The first Tome is located off the main sewer area before the large circular room that precedes the entry to the Skaven tunnels. It is tucked away in a t-shaped offshoot room along with some loot. The tome can in fact also be taken slightly earlier through a window in the small supply room at the base of the large sewer staircase.
The second Tome can be found in the back end left corner of the section of the map which contains a wooden walkway leading to the next skaven hole.
In the Skaven complex, the third tome is found at the end of a cul-de-sac tunnel found by turning left twice from the main entrance.
Grimoires[ | ]
The first Grimoire is hidden in the large sewer staircase in a small cell that can only be accessed via a jumping puzzle. There are also two loot spawns on the way to the grimoire.
The second Grimoire can be found after descending into the Skaven tunnels. Before the level opens up into the Skaven complex, the second grimoire is found by keeping to the right side of the map, hidden behind a frayed bit of cloth.
Video Walkthrough[ | ]
Guide[ | ]
The Enemy Below is a moderately-challenging map featuring a mix of fairly open spaces and close-quarters tunnels. Some ogre and patrol spawns can be more challenging that others, but most areas offer enough routing choices and fallback options to allow for relative secure play. The escape event, like most escape events, can lead very quickly to the disintegration of a poorly coordinated or inexperienced team. It can be worth spending a moment to lay out the strategy during this section to make sure everybody has the same plan in mind.
Event One: Demolish the Idol[ | ]
Just prior to this event, there is a one-way drop down from a tunnel. This is an excellent vantage point from which to either kill outright the stationary stormvermin ahead (using sniping weapons such as the Trueflight Longbow, Longbow, Crossbow, or Handgun) or pull them towards the group using less accurate ranged weapons (Brace of Pistols, Hagbane Swiftbow, Drakefires, etc.) for a focused fight. If possible, avoid pulling the stormvermin while there are still rats or specials pursuing from behind or an ambush/horde is incoming. There's no need to rush, here, and having the Stormvermin hop on on the ledge while a horde boils out of the tunnel behind you is something best avoided.
Once the heroes have dropped down into the final Skaven complex area, the task at hand is to deliver three explosive barrels to an Idol located across a short rope bridge while a steady stream of medium-sized hordes and specials attempt to interfere. This task is quite easily done in various configurations, as long as enough heroes are paying attention to killing the rats so that they don't build up to truly threatening levels. Running the barrels to the detonation sites is fairly easy, so this job can be left to less experienced team members. After the last barrel has been placed, a barrier will collapse allowing the heroes to begin their escape. Placing the last barrel either on the lowest or upper locations makes for a quicker return to the exit as the "middle" barrel location is the furthest.
Event Two: Escape the Skaven Complex[ | ]
Once the idol has been demolished, the heroes must make their way from the Skaven Complex into a tunnel escape event. Hordes will spawn at intervals. The escape isn't especially difficult as long as the team stays together. Players in the lead of the escape should check periodically that their team is following them. Shared speed potions can make the escape quite rapid, but they should be saved until the initial tunnel collapse scripted event, as it can be difficult to see which path remains open while under the effects of a speed potion. Firebombs or conflagration patches placed behind the team can slow or entirely eliminate pursuing rats.
Map[ | ]
| Ubersreik | Act 1 | The Horn of Magnus • Smugglers Run • Supply and Demand • Black Powder • The Wizards Tower |
|---|---|---|
| Act 2 | Engines of War • Man the Ramparts • Garden of Morr • Wheat and Chaff | |
| Act 3 | Waterfront • Well Watch • The Enemy Below • The White Rat | |
| Last Stand | The Fall • Town Meeting | |
| DLC Missions | Drachenfels | Castle Drachenfels • The Dungeons • Summoner's Peak |
| Karak Azgaraz | Khazid Kro • The Cursed Rune • Chain of Fire | |
| Stromdorf | The Courier • Reaching Out | |
| Death on the Reik | Reikwald Forrest • River Reik | |
| Arrogance Lost | Trial of the Foolhardy | |